Skillshare – Create Amazing And Beautiful Fractals With Jwildfire-SkilledHares
English | Size: 1.08 GB
Category: Tutorial
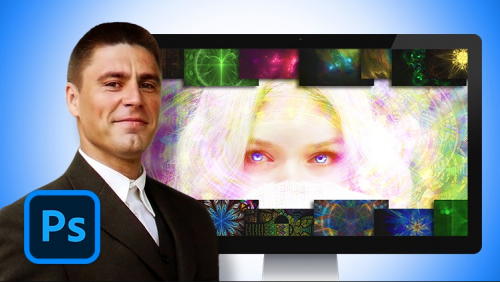
This is a professional photo manipulation and fractal creation course. This course will raise your digital art skills and develop your Photoshop and JWildfire knowledge. You can use what you learn here to earn more as a freelancer or employee.
In this course, you’ll learn how to create amazing fractals from scratch with JWildfire. Afterward you’ll create a cool-looking Photoshop composition, using the fractals you created!
You’ll need to Photoshop installed on your computer. Any Photoshop version released after 2010 will work.
This course is for:
Complete Photoshop beginners who want to learn the basics of photo compositing and manipulation.
Intermediate Photoshop users who want to pick up some extra photo compositing tricks and techniques.
Create an inspiring and jaw-dropping photo manipulation and fractals, alongside me.
You’ll practice alongside me and create amazing photo manipulation and create amazing fractals. Easy to use project files are included. By practicing as we go along you will boost your confidence.
You’ll absorb professional techniques and tricks by doing.
Who the heck am I and why should you listen to me?
My name is Adrian Scheff and I’ve been successfully teaching Photoshop and other design software for 10+ years. Hundreds of thousands of students learned professional Photoshop with my gentle instructions.
Listen to what other people say about my courses and tutorials:
• Gogo: “Excellent tutorial!!! I like the fact that you are focusing on details!”
• Victoria: “The detail in this is amazing”
• Lisa Lampe: “Impressive tutorial, Adrian!”
• Fiyana Mariya: “You are awesome.Thank you so much.”
• Jean P. Brinkley: “Amazing result, such a great image choice! Thanks! :)”
• Frans Gunterus: “Thanks Adrian for sharing this awesome tutorial. I really appreciate it!”
• KremKo: “Perfect tutorial. Thank you so much. :)”
• Chantal: “Thanks for this tutorial :D”
• Lucas Campau: “Great tutorial. In just 10 easy steps you are seeing a completely different image. Bravo!”
• Justim Melia: “Nice job really worked on an image of mine. Much appreciated.”
• southernwulf: “Thanks , great tutorial”
• sohail iftikha: “nice work dude”
• Maidul Islam: “Awesome Post. Lighting is most beautiful. Thanks for the Post.”
• Yvonne: “Thank you for this, it’s a stunning effect! I found it also useful to work a little with the saturation mask to make her green eyes pop a little more.”
• Anonymous: “Awesome tutorial!”
• Stephanie: “That looks incredible! I can barely recognize the images in the final result. Well done and thanks for sharing.”
• imran: “Nice graphic design thank you for sharing.”
• Crispylogs: “nice tutorial about photoshop.!! loved it so shared it..”
• Giulio: “Awesome Tutorial. I was wondering for something like that :)”
• Larry: “Thanx for the tutorial, really nice effect. ”
• Murnax: “Thank you for nice tutorial. :D”
• Sila Mahmud: ” These are amazing. Super creative and imaginative and all things that are good.”
• fastgood: “very nice, thank you very much :)”
• Daily Delicious Design: “Thanks a million! Easy to follow and very effective. ”
• Maritza Andrade: “Interesting tutorial. I made it with a high heel. Wonderful result.”
• Gezim S: “Nice tut :)”
• Justin G: “Awesome tutorial!! I’m no pro at photoshop, but this tutorial was awesome!”
• Judy C: “That was a fun tutorial. I used PSE9 so I didn’t have some of the selections, but it still turned out pretty good. Thanks!”
• macarip: “wow,,, good tutorial. :)”
• EB: “Thank you for providing and amazingly written tutorial. As someone very new to photoshop this was very easy to understand for the most part so I appreciate that you took into account complete newbies by providing things like shortcuts for doing stuff as well as detailed enough but concise explanations. I wish I could find more tutorials of this quality.
The only confusing part to me was the curve adjustment for the girl with the blue and red bit. I didn’t really understand that step but I think there is only so much you can explain without showing it through video or something.
Still an amazing tutorial.”
• Srboljub Dimitrijevic: “Thank You Beautiful !!!!”
• MP: “you can always be creative in making robotic effect to an object. This Adrian’s is an example, simple effect for beginner to try. I like IA, so I made some androids from my fave actors. Hi5, Adrian! :)”
• tutor dipu: “Actually it is best tutorial.It is very helpful and important.Well explained, great article and really all is awesome !!”
• Hanthi: “I love it”
• Palo: “Great tutorial, best regards from Czech Rep.”
• mukulmamun: “This is awesome !!This is SUPER helpful.I’ve been curious about this. Lovely tutorial too.”
• Trevor Garratt: “I love that end results. I am going to check those links now since some are saying they do not work.”
• Photoshop Inspire: “Nice work.”
• Rayleen Slegers: “That was awesome.I thought I knew most but I still picked up on a few things!
Simple things like Adding colour balance etc via the layers panel.
Thanks heaps!
Where can I post my version? Is it ok to put up on facebook?”
• Nicholas: “Awesome article. Great content.”
• Lonnie: “Excellent tutorial thank you”
• Tophan Kjumar: “Beautiful beautiful beautiful”
• Hannan Tariq: “Awesome